
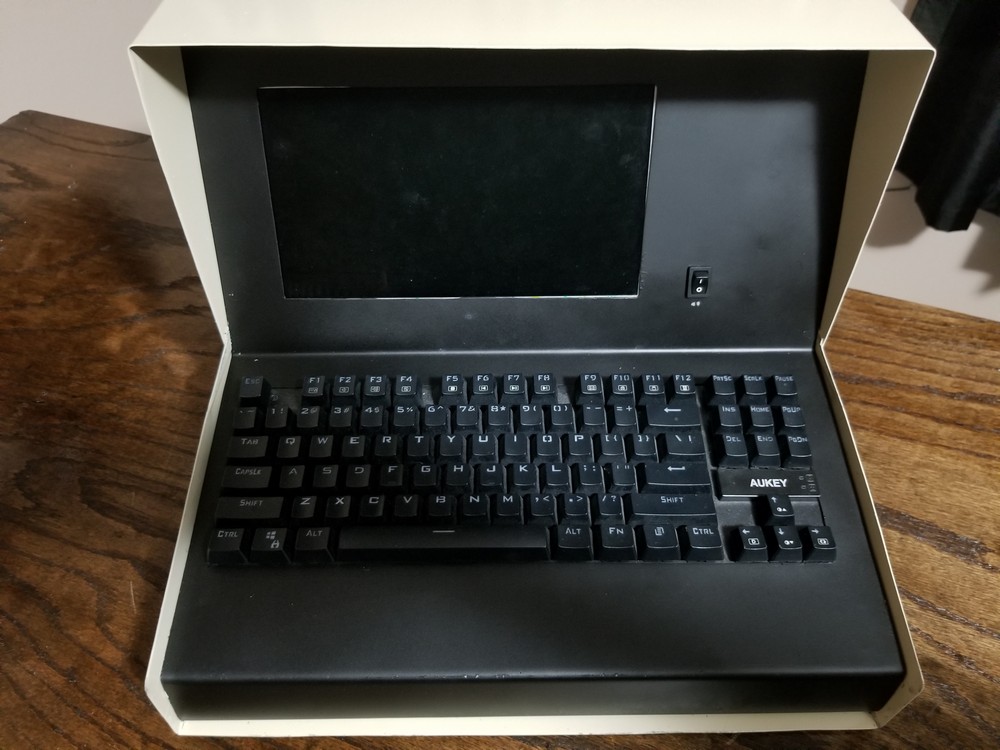
I’ve always been a fan of vintage computers. I especially like the old Apple II computer and the Commodore 64. What started out as inspiration from Fallout 4, lead to me creating a Raspberry Pi terminal. I wanted to build a computer that looked the part, but could be switched between systems easily.
Enclosure
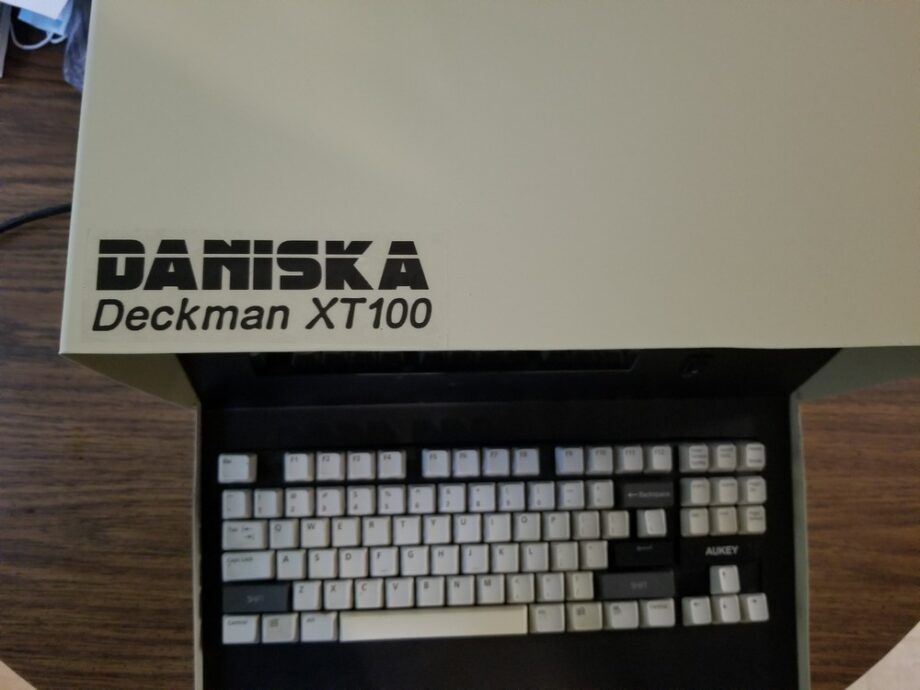
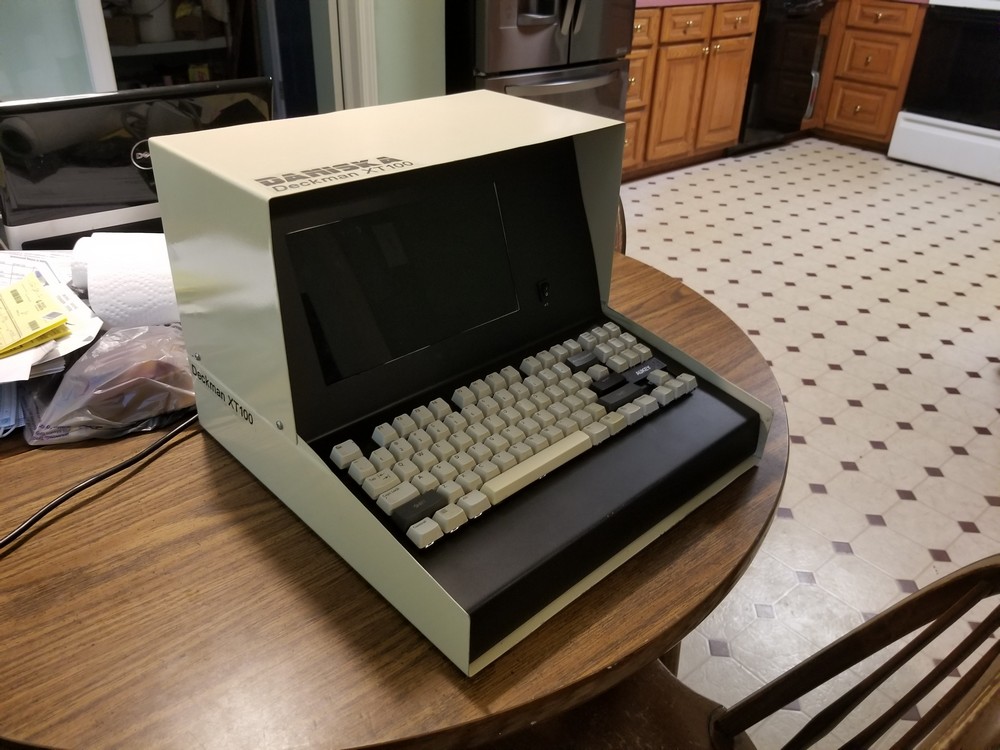
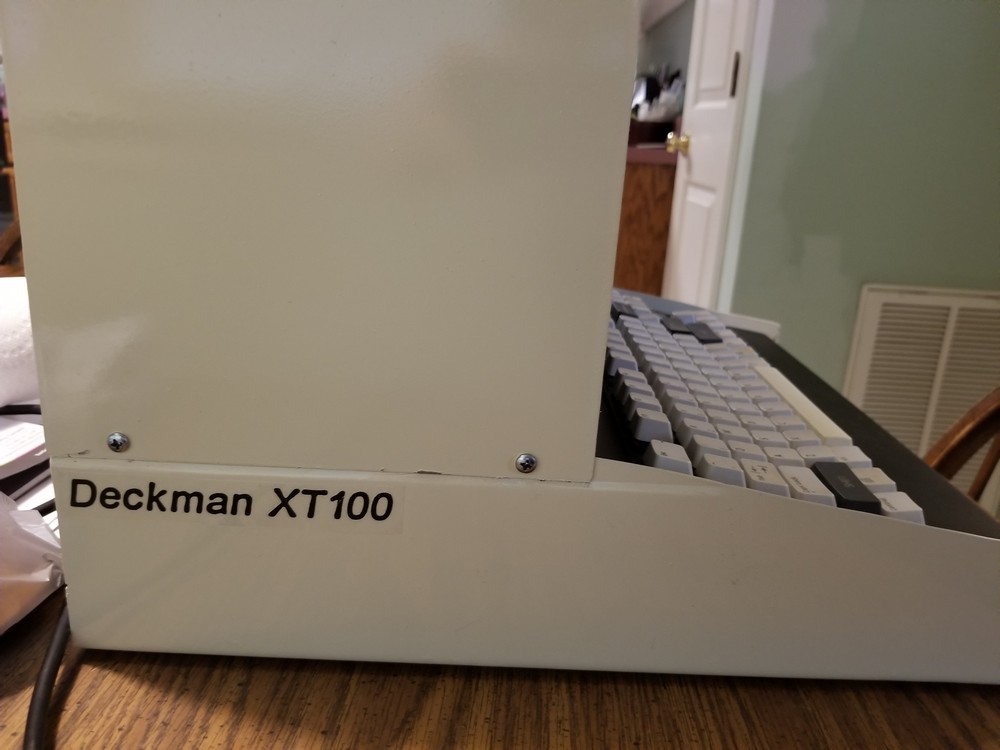
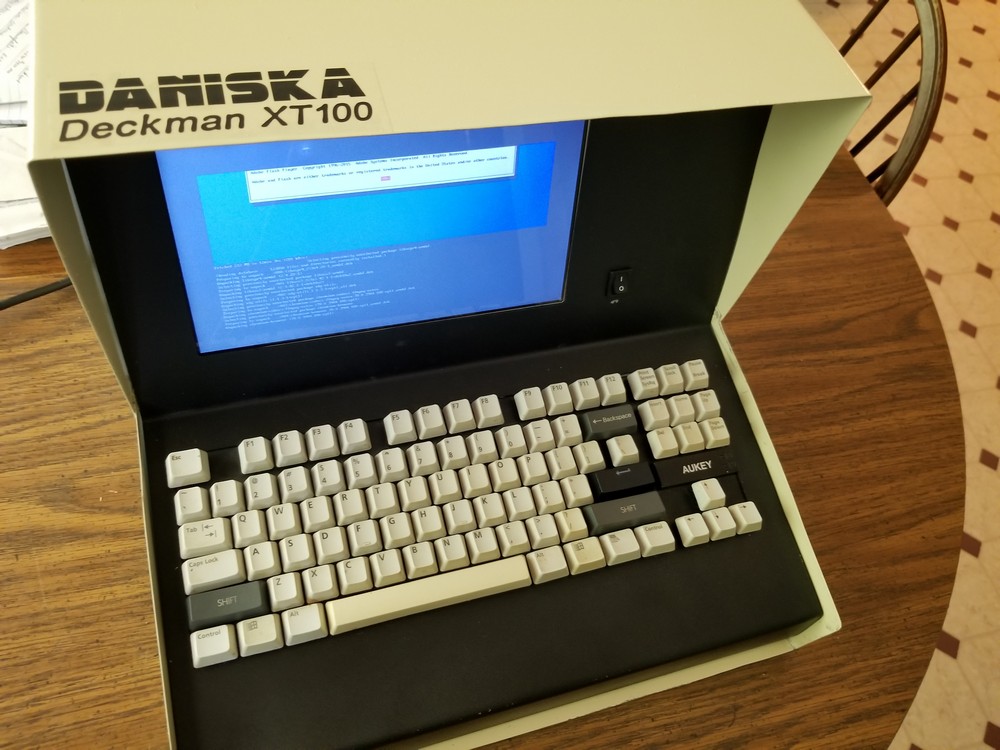
I wanted the enclosure to look like a vintage computer from the 80’s. There are several computers of this era that have the screen incorporated into the overall design. A primary source of inspiration were the terminals from Fallout 4. Another source was the Beckman 421 terminal. That is ultimately where I came up with the name Deckman.
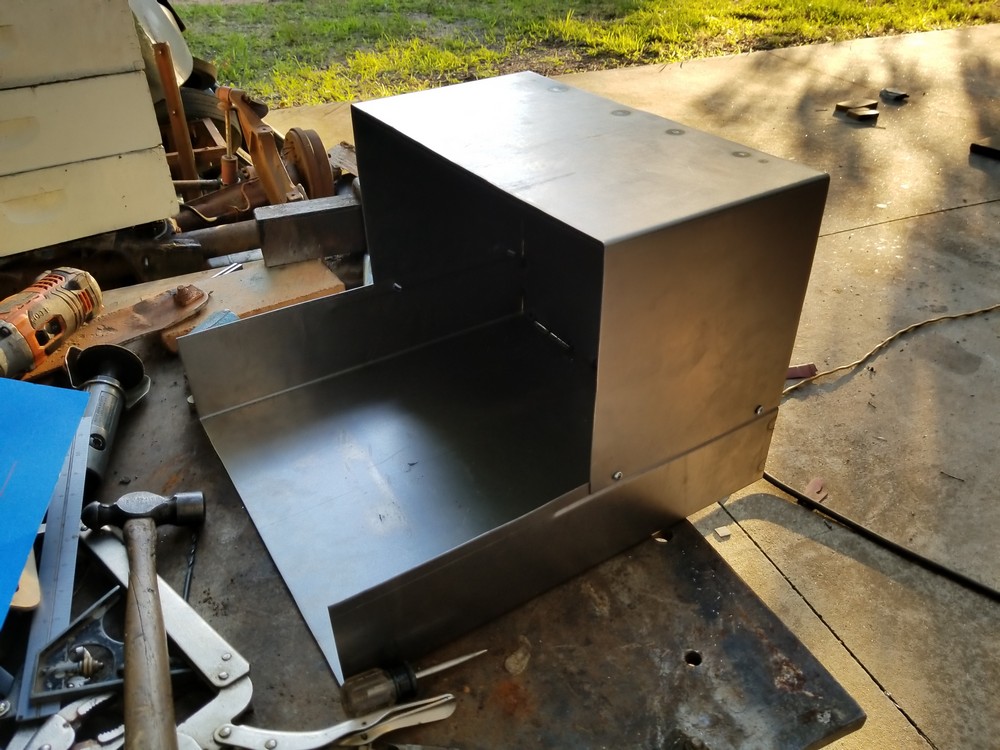
Starting with some cardboard, I made rough templates for the shape I was going after. I wanted a boxy look with sheet metal overlap. Very common for the era.
Using these templates, I cut out the sheet metal using electric shears and cleaned the edges by shearing the metal with a shear.
From there, I used a sheet metal brake to bend the corners and form the box.
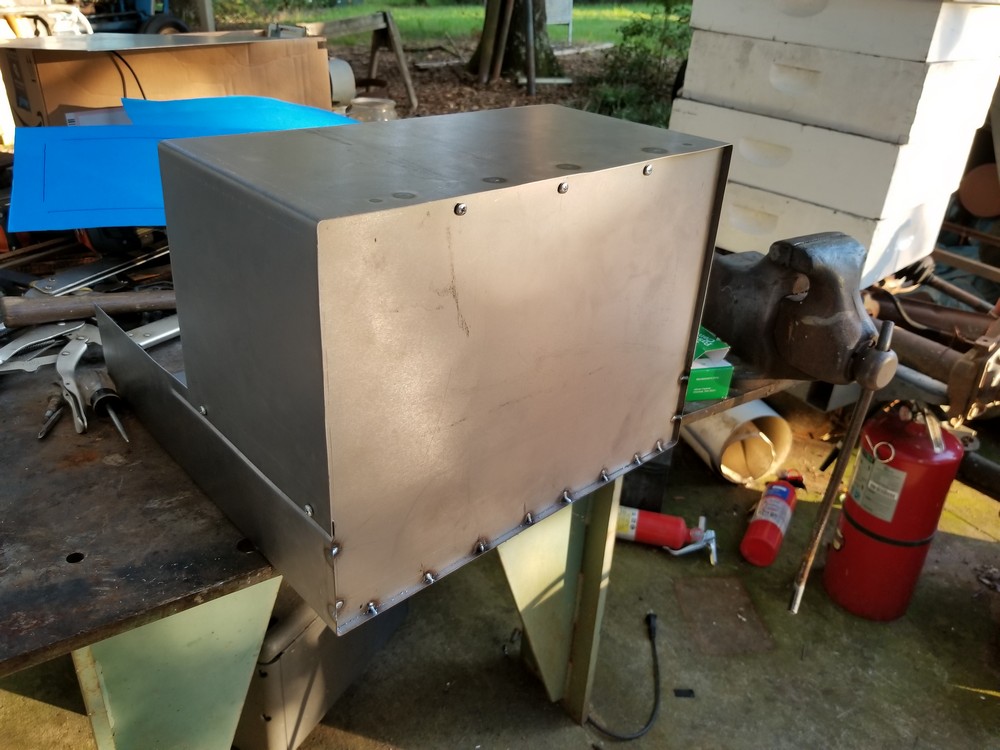
To assemble the enclosure, I made small L shaped tabs that I welded near the edges. Then, sheet metal screws are screwed in to hold everything together.
The top piece fits into a lip on the bottom panel. This was formed using a bead roller and is about half an inch wide. This allows the panel to sit flush on the side.
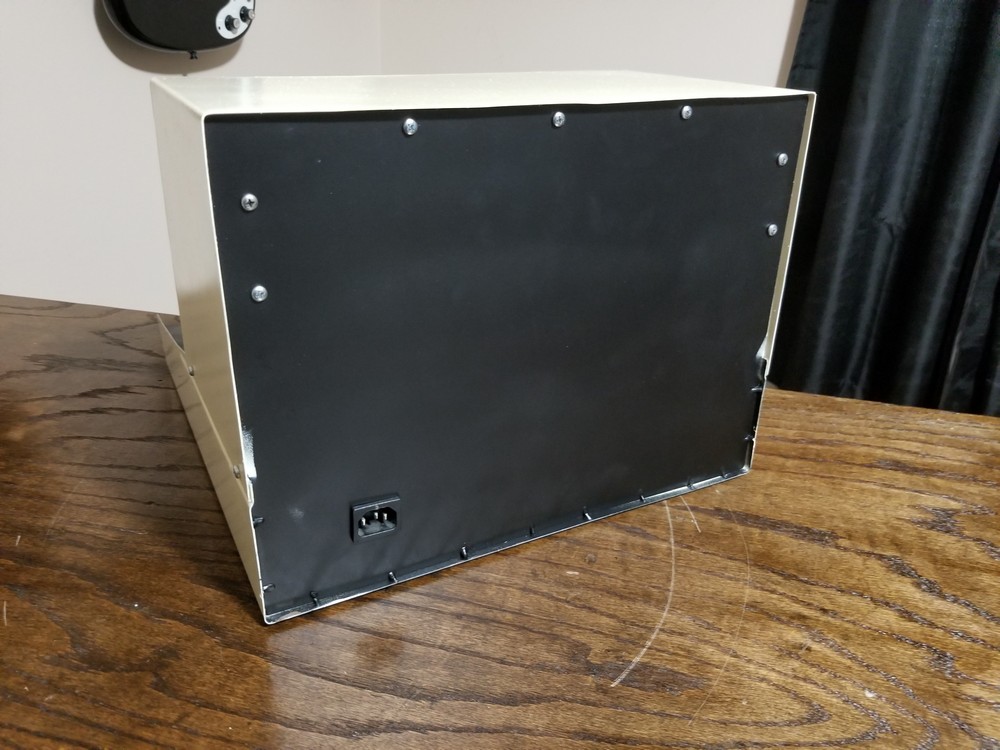
For simplicity, the rear panel is welded to the bottom section. This means to get inside the enclosure, the top panel must be removed.
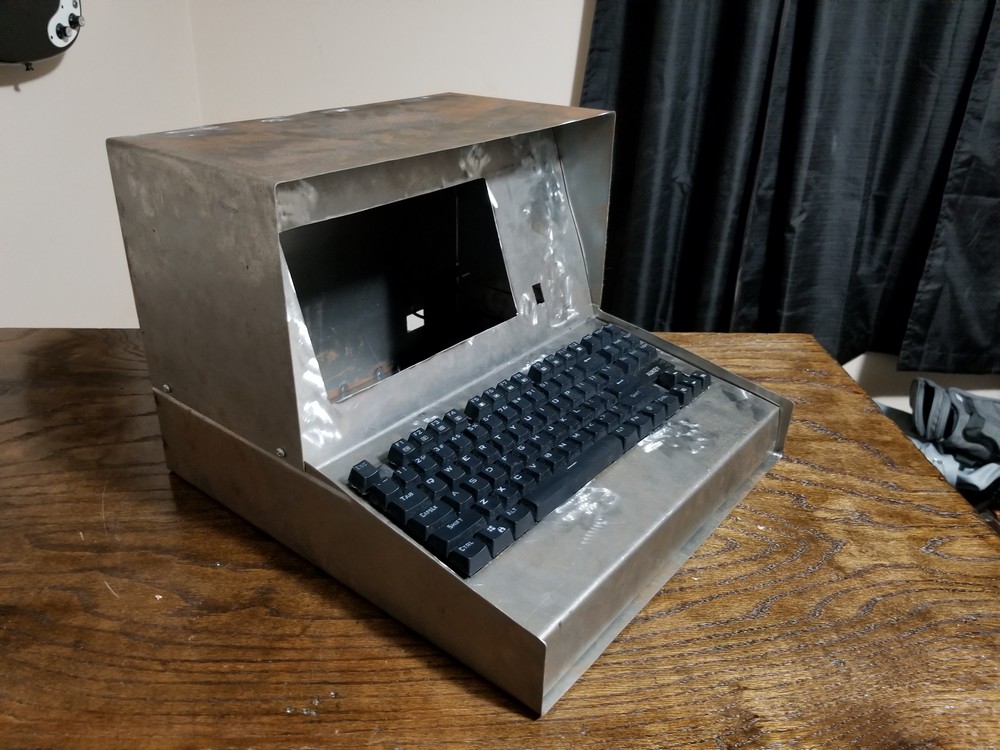
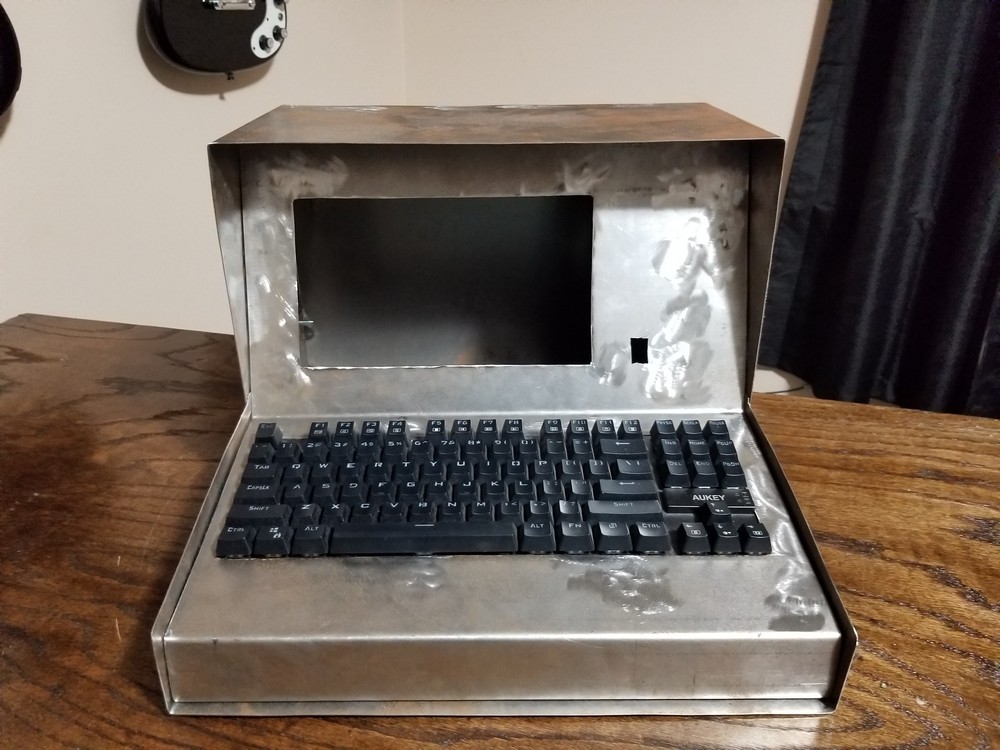
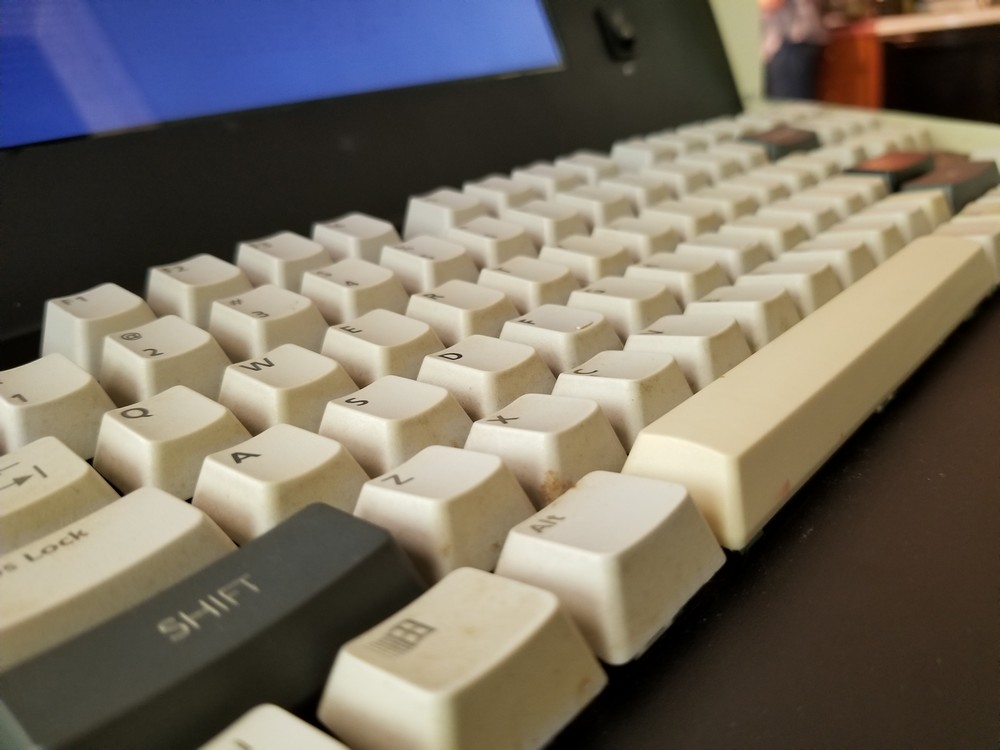
The keyboard and screen panel is a single piece that connects to the bottom panel and then at the rear panel. I cut out a hole to fit the Aukey mechanical keyboard I had and then another cutout for the laptop screen. As well as a small hole for the power switch.
Internals
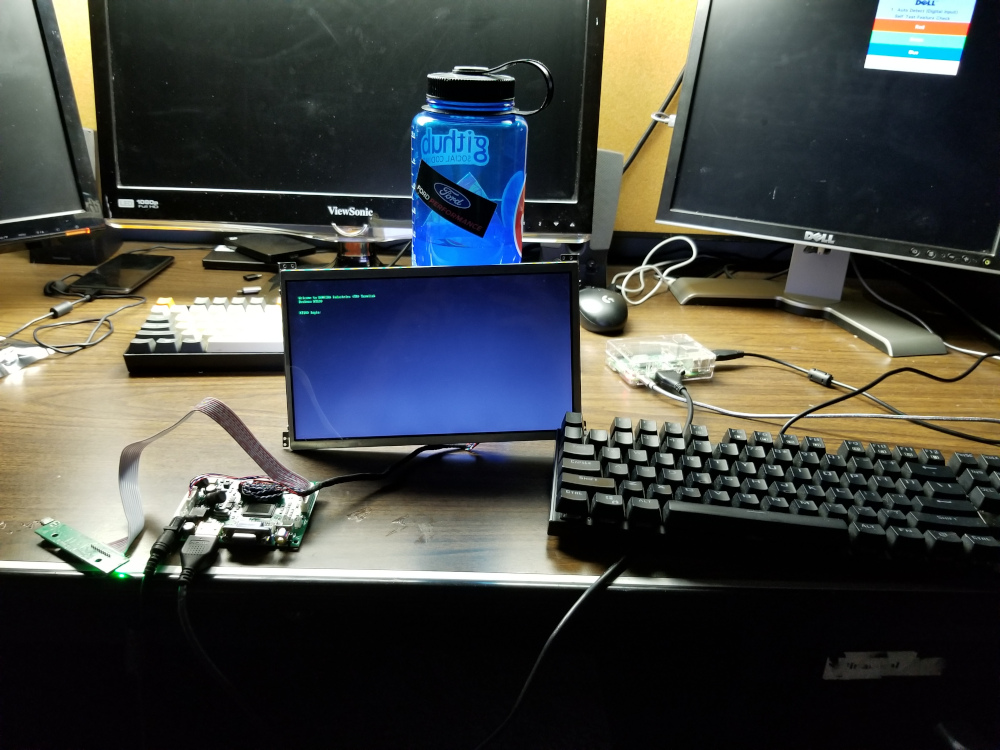
I went with a Raspberry Pi as the core for the terminal. The Pi is cheap and robust.
For power, I ran the power cord to the front panel switch and then to a standard power brick to provide the Pi with 5V. The screen also ran off 5V so this is shared.
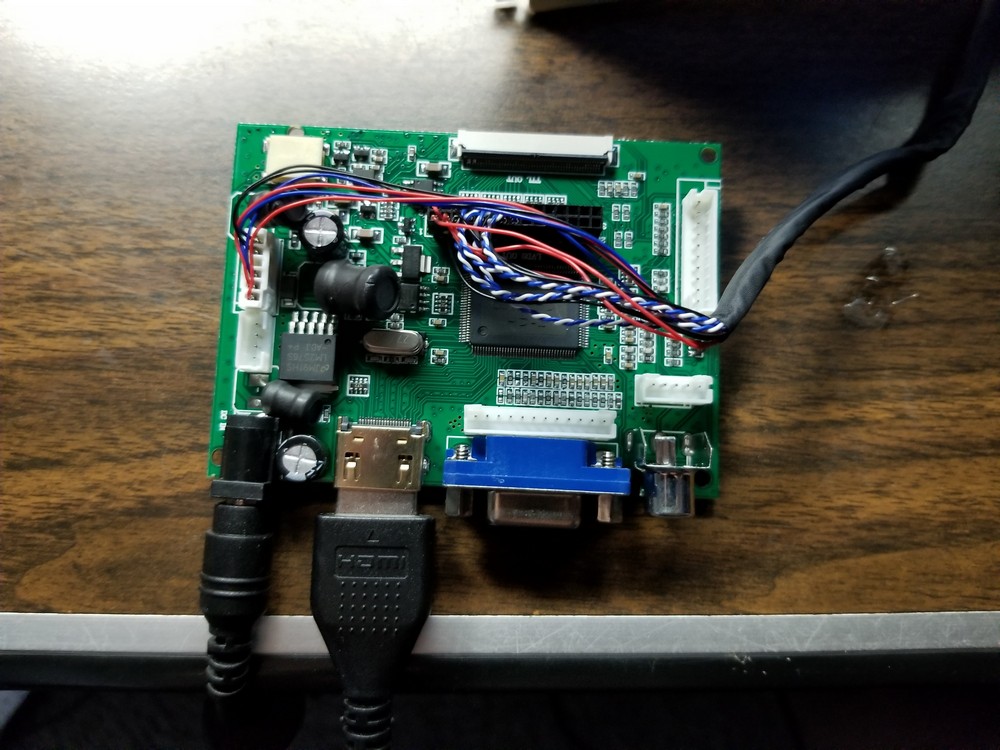
The screen is a laptop screen that salvaged from an old laptop. The LCD uses LVDS for input, so to use the Raspberry Pi’s HDMI signal, I bought a converter board. This takes the HDMI signal and drives the LCD over LVDS.
The power brick for the adapter board is ran through the main power switch as well
Paint
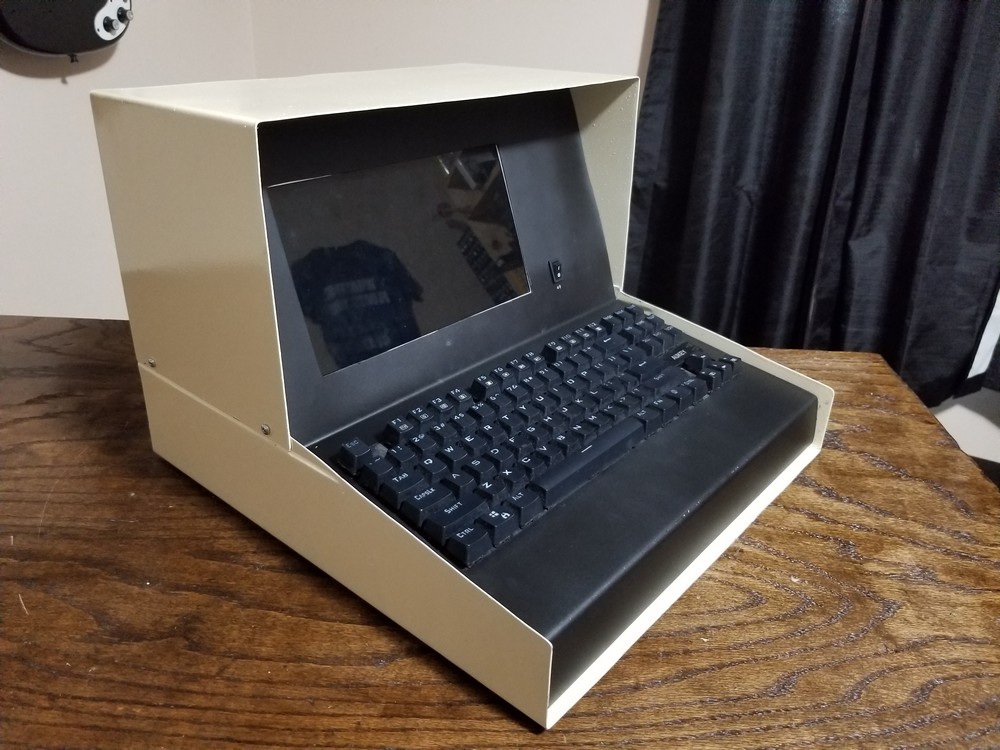
For the paint, I went with an off-white color to make the electronics of the 90’s and 2000’s. Front and rear panels got a nice coat of flat black. Overall the paint job came out great.
Keys & Stickers
After getting the basic enclosure and guts figured out, I wanted to make the design more unique and more authentic. I have an old keyboard that came with the Hewlett Packard PC running Windows 95 that I used growing up. The keys on this keyboard actually fit the Aukey keyboard. I sacrificed the keys for this project and gave the Deckman authentic keys.
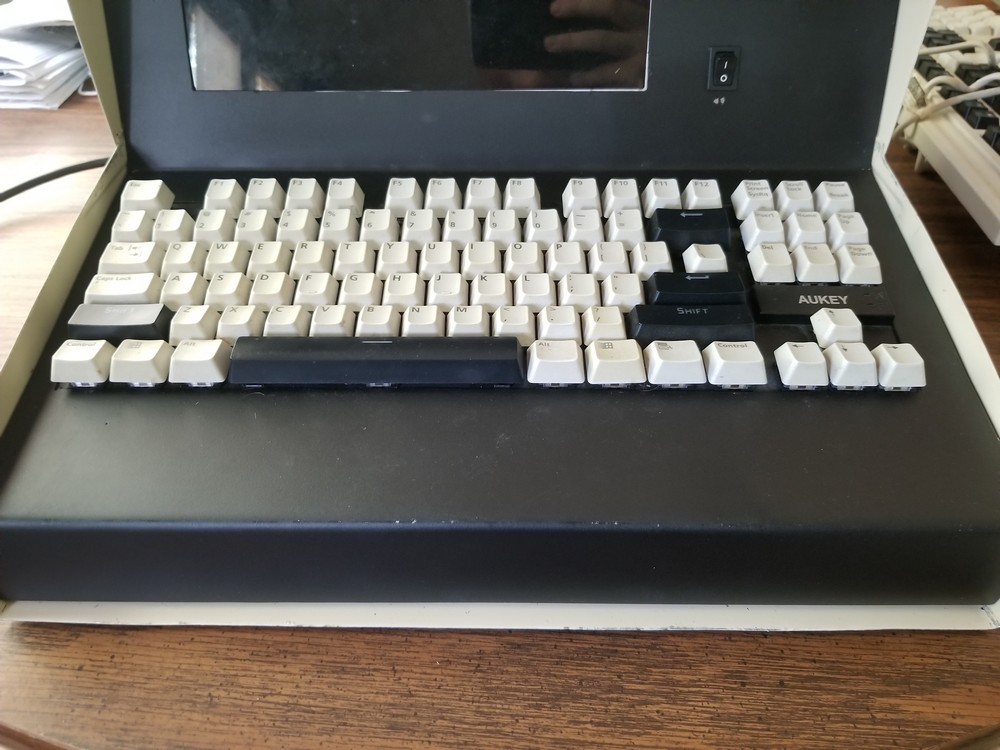
I printed out some nice labels too. These are just printed on a clear sheet with a laserjet.
Software
I installed Raspbian onto the Pi’s SD card and after the basic setup, I installed Retro Pi. This is designed for Pi based consoles primarily, but I found it worked fairly well to manage the PC emulators on here. I setup some custom menus so I can launch Windows 3.1 and DOS easily. Some of the systems include Apple II, DOS, Win 3.1, Win 95, Commodore 64, and ZX Spectrum.
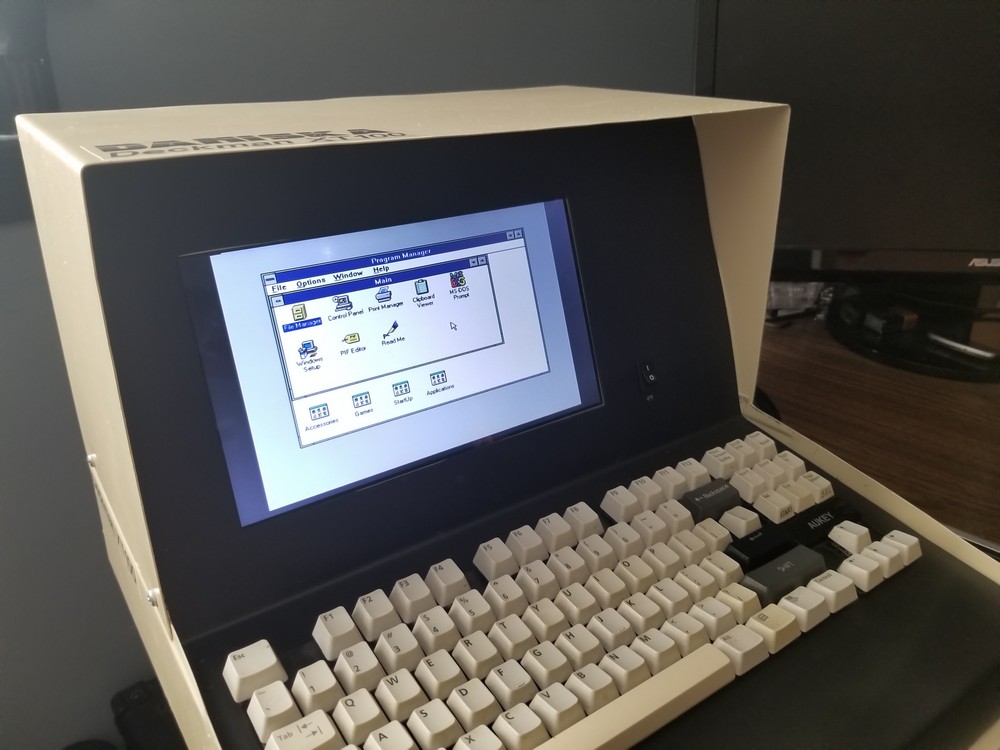
This Raspberry Pi Terminal was a great project and the end result is a fantastic retro terminal. Emulators are cool and all, but unless the machine looks the part too, then it isn’t worth it.